Did you ever wonder what it takes to brew a beer? You would be suprised to know that the brewing process is quite simple. It starts by heating up grains in water which dissolved sugar that can later be fermented once yeast is added. Below is our step by step guide on how to brew beer.
Ingredients to Brew Beer
Water
Of course, you will need plenty of water. If your tap water is not too clorinated, you can use that. Otherwise, we recommend to use filtered water
Grains
Most commonly, beer is brewed with malted barley. For a lighter flavored beer, corn, rice, wheat or other grains can be mixed with malted barley. The grains contain the sugar that is transformed into alcohol during the fermentation process. For beginners, ready-to-use malt extracts are readily available, making the brewing process faster and easier than if your are working with malted barley.
Hops
Hops flowers are used as a flavoring agent to add bitterness to the otherwise sweet beer. The amount and time it is added to the beer in the process largely determines the taste of the beer. Hops for hobby brewing are available in a convenient and storable pellet form.
Yeast
There are two categories of beer yeasts: ale and lager. Even if you’ve never brewed before, these two terms surely sound familiar. Lager yeast will lead to a lighter beer while ale yeast will lead to a darker, stronger beer. For beginners and hobby brewers, lager yeast is the better choice since it works well at room temperature. Do not try to use bread yeast to brew beer.
Let’s get started with the brewing process
Before we get started with the actual brewing steps, here is a quick overview of how long it takes to brew beer at home:
- Time requirement on brewing day: 3-5 hours
- Fermentation: 2 weeks
- Maturing in the bottle: 2-3 weeks
So if you get started right away, you can have the first sip of your finished beer in around 4-5 weeks.
Step 1 – The Mashing Process
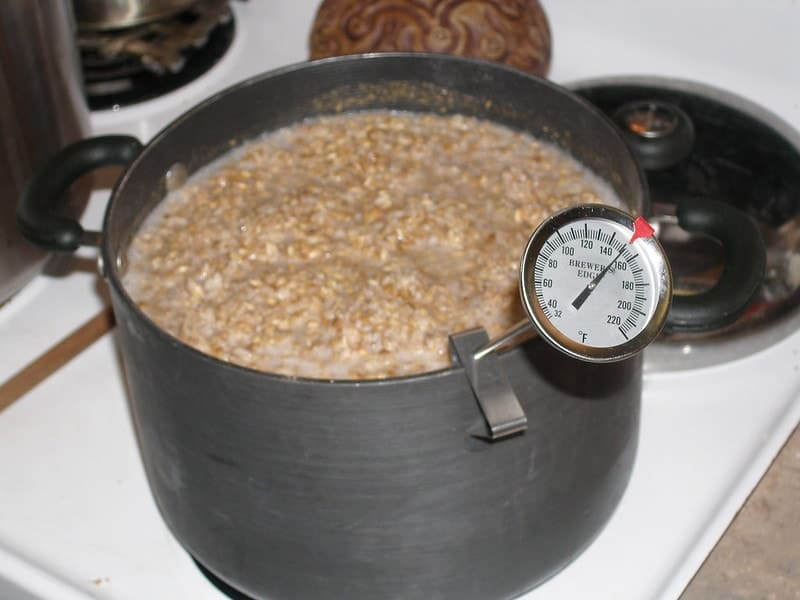
During the mashing process, the grains used for the beer production are brought to a boil in water. This process converts the starches in the grains into fermentable sugar. The process starts by bringing water to a temperature of 160°F (71°C) and adding the malted barley into the water with a brew bag. A brew bag is like a large tea bag that makes it easy to remove the grains from the pot after mashing.

Stir the grains well into the water and keep the temperature at 148°F (65°C) for around 30 minutes while occasionally stirring the water to extract the maximum amount of sugar from the grains.
After 30 minutes, the water has changed its color and you will be able to enjoy an incredible smell of your (still very young and alcohol-free) beer. The liquid you are now looking at is called the wort.
Pull the brew bag out of the liquid and let it drain out. Do not squeeze the bag since that might lead to undesired bitterness. Just let all the liquid flow out naturally.
Step 2 – The Boiling Process
Now, the wort is boiled for about an hour. This process eliminates all the bacteria in the wort before the yeast comes in to ferment your beer. During the boiling process, hops is added for additional flavor. For beginners, we recommend using hops in a convenient pellet form.
If you add the hops at the beginning of the boiling process, the beer will get a more bitter taste. The later you add the hops, the less bitter your beer will be. For a light bitterness, you can add the hops after around 40 minutes of boiling. During the boiling process, make sure to stir the wort regularly.
Step 3 – Cooling the Wort
Since yeast cannot withstand heat, the wort needs to be cooled down before starting the fermentation. To prevent bacteria from getting into the wort, the cooling process should be as quick as possible. You can achieve that by putting your pot into a large sink or a bathtub and cool the outside with cold water. Stir the wort continuously. Once the outside of the pot is cooled down, drain the water and add new cold water as well as ice cubes. After about 20-30 minutes, the wort should have a temperature of around 80°F (27°C). The boiling process killed off all the bacteria inside the wort. If any bacteria make their way into the wort now, it could ruin your beer. Therefore, it is extremely important that everything that comes into contact with the beer from now on is sanitized properly.
Step 4 – Sanitizing Everything
As mentioned, all materials that come into contact with the beer wort from now on need to be sanitized. Make sure not to dry the items off with a cloth as that may contain bacteria as well. Either let it air dry or use while still wet.
Step 5 – Fermentation
Pour your lager yeast into a cup of water with a temperature of 90°F (32°C) and let it sit for a minute or two.
After sanitizing the fermenter, which can be a food-grade bucket or a carboy, use a sanitized strainer and pour the wort into the fermenter. Add an additional third of boiled water with a temperature of around 80°F (27°C) to the wort (if you had two gallons of wort, add one gallon of water).

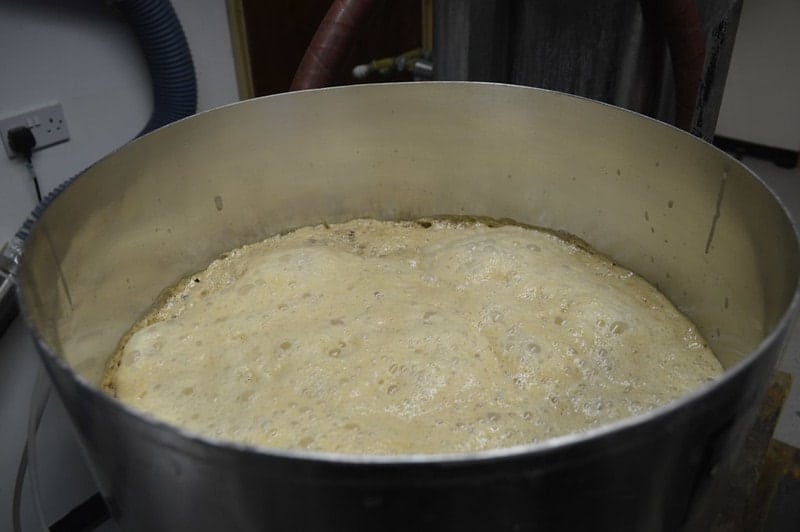
Now it is time to add the yeast liquid to the wort. Once the yeast is added, carefully shake your fermenter a couple of times to add oxygen to the wort. The yeast needs this oxygen to turn sugar into alcohol.
Put the lid onto your carboy and store it in a dark place at around room temperature (65-70°F) for around two weeks. If you live in a hot area and don’t have air conditioning, you can get a brew bag that allows a controlled temperature around your fermenter. The lid of the carboy should have a fermentation lock, or airlock. The fermentation lock will make sure that the carbon dioxide that is created in the fermentation process can escape but no contaminated air that could destroy your wort can enter the fermenter.
Step 6 – Measuring the Alcohol Content
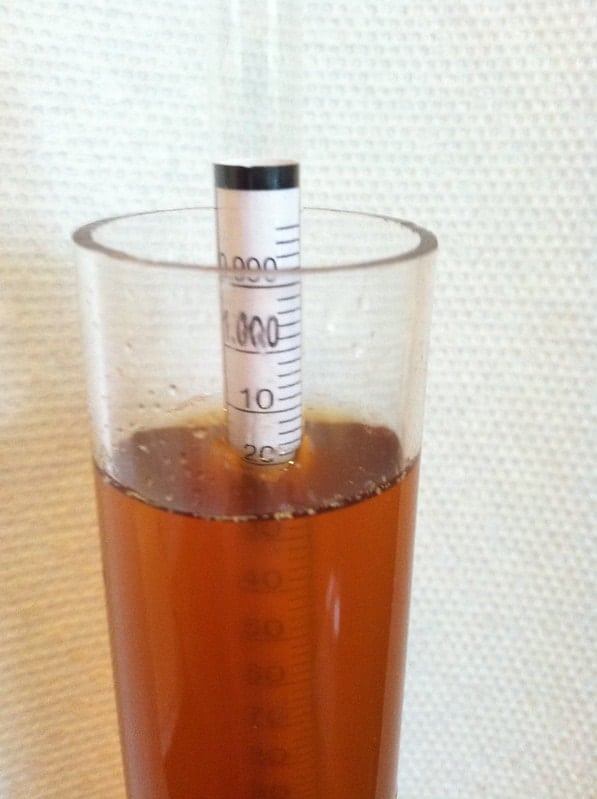
Once you start the fermentation process, take a small sample of your wort and check the specific gravity using a hydrometer. The hydrometer measures the wort’s density compared to water. The higher the sugar content, the higher the specific gravity. Take note of your original gravity and check the final gravity again at the end of your fermentation process. You can now calculate how much sugar has been converted into alcohol and therefore the alcohol content of your beer. You don’t even have to solve any complicated equations yourself – just enter your measured results into this calculator.

Hint: If you decide to try your beer during the fermentation process (which you probably will), it might not actually taste great. Don’t be discouraged, the flavors will develop over time and it is normal that it tastes bitter and stale at the initial phase.
Optional Step – Flavoring the Beer
If you want to brew a flavored beer, you can add additional ingredients during the fermentation process after around one week. This can be additional hops (called dry-hopping) or other flavors like fruits. Regardless of what flavors you are using, everything that goes into the fermenter needs to be completely germ free. So either heat your flavoring agents or sanitize them before adding to the beer. Just make sure not to put hot ingredients into the brew as that might kill off the yeast.
Once your brew is ready to be bottled, you can put it in a fridge. This optional process lets the yeast and other solid things inside the beer sink to the bottom of the fermenter, giving you a clearer brew. You can also decide to leave it as it is if you prefer a darker beer.
Step 7 – The Bottling Process
Before actually putting the beer in the bottle, check the specific gravity of your beer again. Only if it hasn’t changed in two consecutive days, the beer is ready to be bottled. This means that the yeast has turned all the fermentable sugar into alcohol.
The next step is to dissolve priming sugar or corn syrup in boiling water. Add the sugar water to a bottling bucket. The sugar will continue to ferment in the bottle, which will make it nice and bubbly. Now, carefully pour the fermented wort into the bottling bucket. Right now, the yeast and other residuals are sitting at the bottom. Make sure to leave these residuals in the fermentation bucket so your beer will be light and transparent.
Now it is time to sanitize all the bottles and fill the beer in the bottles. Close the bottles up and store them at room temperature for around 2-3 weeks.
Step 8 – Enjoy
All you need to do now is chill your beer for another day before tasting the first bottle of your very own delicious beer.
If you are inspired to brew beer yourself now, you can check out some great beer recipes or order a home brewing kit to get started rightaway.


[…] Want to learn more about how to brew beer?Check out the with every step to the perfect homebrew here. […]