Banana moonshine is a popular drink throughout the tropical parts of the world, especially in East Africa. In Uganda, banana brandy moonshine is called “waragi” – war gin. Making banana moonshine at home is actually quite simple. In this post, we will give you a step-by-step banana brandy recipe. Let’s dive right into it.
Overview:
- Time to prepare the mash: 3 hours
- Batch site: 3 gallons (12 liters) of mash
- Results in ¼ gallon (1 liter) of banana moonshine
- Fermentation time: 4-15 days (expect about one week)
Ingredients:
- 5kg bananas
- 1.5-2 gallon of water
- 5g (1 tablespoon) of Red Star Champagne Yeast (or any other distiller’s yeast)
- Optional: 5g (1 tablespoon) of yeast nutrients
- Optional: 5g (1 tablespoon) alpha-amylase
As already mentioned above, making banana moonshine mash is relatively simple and you don’t need many ingredients. The most important thing is that you use very ripe bananas. They should be dark yellow with some brown spots – but not rotten.
A green banana consists of mostly starches and has a very low sugar content. Only as the fruit continues to ripen, enzymes in the banana skin help to convert starches into sugar. A ripe banana has a very high sugar content of over 20% - sometimes even up to 30%. That is more than in apples, pineapples and most other fruits.
While some other banana brandy recipes recommend adding the banana skins to the mash as well, we do not recommend that. Unless you are lucky enough to grow your own bananas in your backyard, the peels of store-bought bananas are almost certainly sprayed with potentially harmful chemical mixtures that might make their way into your final product.
Since removing the banana skins means removing the source of enzymes that converts starch into sugar that can be converted into alcohol, adding glucoamylase enzymes to your waragi mash helps break down remaining starch into sugar.
You can also follow this banana brandy recipe without adding these added enzymes. This will mean that your banana moonshine brandy mash will have a lower alcohol percentage. Hence, you would be wasting parts of the bananas. Alpha-amylase is available in most brew shops and online and doesn’t cost much.
Hint: Glucoamlyase enzymes are the same enzymes that occur naturally in malted grains. For the beer and whiskey production, these malted grains are added to help break down starches into sugar. You could also add malted barley to the banana mash instead of the pure enzymes. This will, however, add a grain taste to your banana moonshine. The pure glucoamylase does not add any taste.
Let’s start with the step-by-step preparation guide:
- Peel the bananas and cut them in pieces.
- Add 1.5 gallon (6 liters) of water and the banana pieces into a large pot.
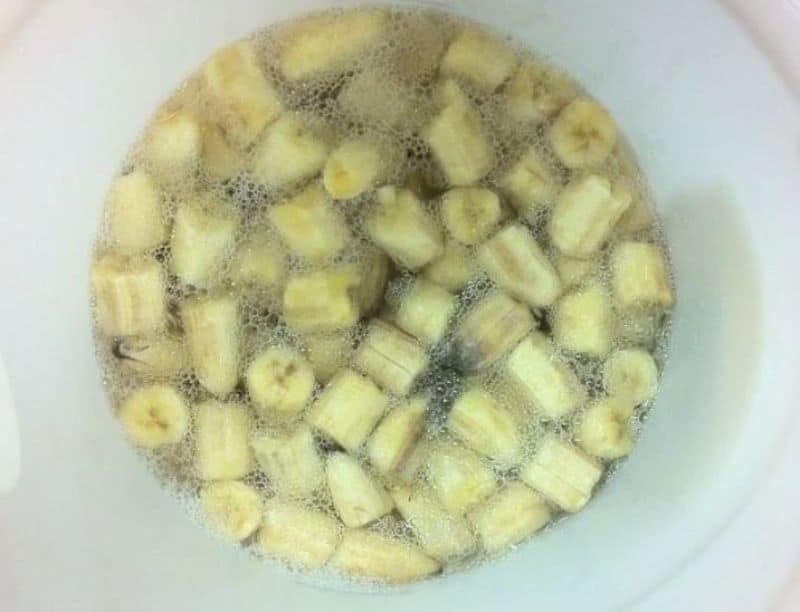
- Use an immersion blender to blend it to a fine pulp
Should you add sugar to your banana moonshine mash?
As mentioned above, with up to 30% sugar content, bananas have more sugar than apples or grapes. Therefore, there is no need to add sugar to your mash. Adding sugar to the wash will make the banana moonshine less smooth and add a rum flavor. But, if you are aiming for quantity, adding sugar to this banana mash moonshine recipe is absolutely possible. For every 2.5lbs (1.25kg) of sugar you add to the mash, add an additional 1.5 gallons of water. Stir the sugar into the mash at 160°F (71°C).
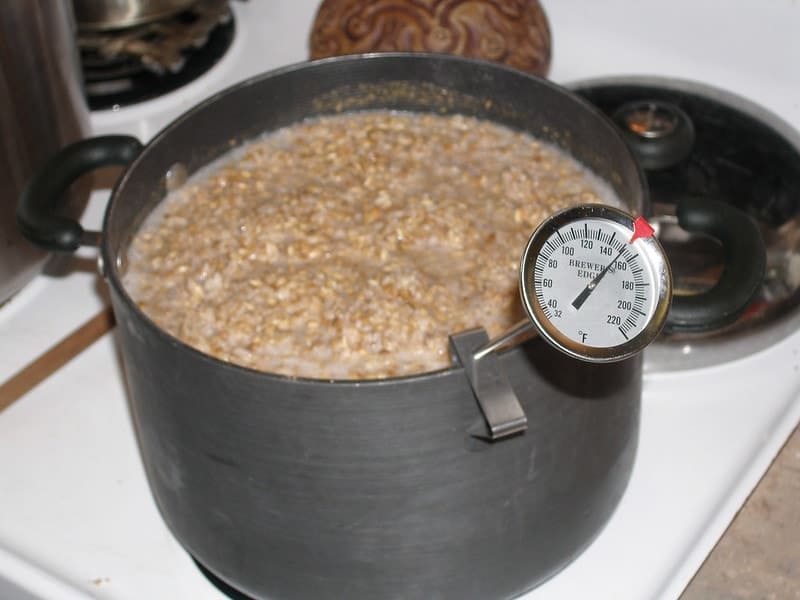
- Heat to 160°F (71°C)
- Optional, but recommended: At the temperature of 160°F (71°C), add one tablespoon (or 5g) of alpha-amylase and stir well.
- Sanitize all items that will come into contact with your mash from now on (fermentation bucket, stirrer, siphon, etc.).
- Transfer the mash into a sanitized fermenter. Banana mash will produce a lot of foam during the fermentation process. Therefore, make sure to leave plenty of room for expansion to prevent your fermenter to explode. To be safe, don’t fill the fermenter to more than half of its capacity.
- Let the banana mash cool down naturally to about 75°F (24°C) while keeping the lid on your fermenter to avoid contamination. Depending on the size of your fermentation vessel, this takes about 1-1.5 hours. If the temperature is still too high after about one hour, you can add a couple of clean ice cubes to the mash to speed up the process or cool the container from the outside, e.g. by placing it into a bathtub with cold water. Since the enzymes need the high temperatures to convert starch into sugar, make sure to wait for about an hour before actively cooling down the mash.
- At a temperature of around 75°F (24°C), you can pitch the yeast and stir it into the mash thoroughly. We recommend using 5g of Red Star Champagne yeast. Since the mash will have a high sugar content, the alcohol percentage of the finished banana brandy wash will be quite high. While normal bread yeast would also start the fermentation process, it would stop converting sugar into alcohol somewhere between 5-7% ABV. Champagne yeast remains active up to around 17% ABV.
- Optional, but recommended: Add one tablespoon (5g) of yeast nutrients at the same time as you add the yeast. In theory, the banana must provides enough nutrients for the yeast to survive. However, adding yeast nutrients gives the yeast a headstart against other organisms like bacteria, molds or wild yeasts that may want to feed on your sugary sweet banana mash. So adding these nutrients decreases the chances of the banana mash going bad and also decrease the fermentation time.
- Close the fermentation container and add an airlock. This will allow the carbon dioxide produced in the fermentation process to escape the container while it prevents anything from entering. Store it in a dark place at room temperature.
- The fermentation process will take anywhere between 4-15 days, depending on the ambient temperature and other factors. Check on the mash every now and then. Once the bubbling stops and the mash doesn’t taste sweet anymore, it is ready.
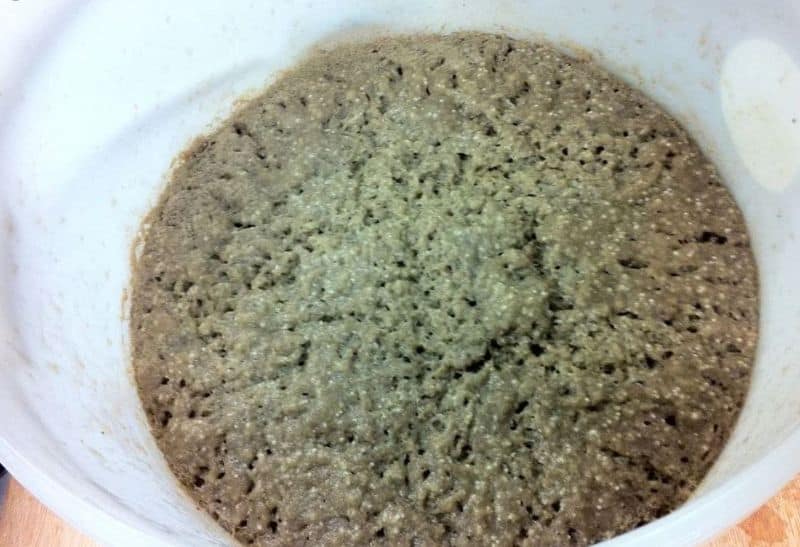
What happens during the fermentation process?
Check out our detailed post and understand how alcohol is created.
- Next, strain the banana moonshine mash through a cheesecloth and make sure to avoid any pulp getting into the final wash. Squeeze out any liquids from the pulp.
- Now, the banana brandy mash is ready to be distilled. To keep the original banana aromas, we’d recommend using a pot still.
Distilling banana moonshine
The banana moonshine wash may still produce quite some foam during the distillation process. So don’t fill up the still too much to prevent the foam from messing up your still. The secret here is to slowly heat up the temperature of the wash.
There should be around 1.5 ounces of foreshots from this recipe. This part contains the toxic methanol and acetone. To be on the safe side, discard around 2 or 2.5 ounces (60-80ml). Then, collect the distillate in different containers, called cuts, of each around 50-100ml and number them. Once the proof of the distillate drops below 60, you can turn off your still. Cover the containers with your banana brandy and let them sit for a day to allow the aromas to settle.
The next day, come back and smell and taste the product of each container. The first part of the distillate may contain some byproducts that give off a bad taste. This is called the heads and you may want to throw them out or add them to your next run. The last parts of the distillate may also contain some very strong aromas and you may want to get rid of that as well. This part is called the tails. Once you’ve decided which parts you want to keep, mix them together and fill them into bottles, jars or a barrel. The homemade banana moonshine will now be around 120-140 proof. Time to age it.
Aging banana moonshine
There are various ways to flavor or age your banana moonshine. Here are a few ideas and you can also combine them:
- Add toasted and/or charred oak chips to your homemade banana brandy and shake the bottle every couple of days. After a few weeks, it will have a nice coloring and you can dilute it water to your desired alcohol percentage. See more on that below.
- The extra banana flavor punch: Peel a banana and cut into thin slices. Add it to the distillate for around 5 days. This adds a delicious banana aroma and is our favorite banana moonshine flavoring.
- Add mulling spices to your banana brandy and let it sit until it has the desired aromas.
- Just leave white. This is also a good option – it will taste great and it is not absolutely necessary to flavor it.
Reaching the desired alcohol content
Once you’ve added your desired flavors and tastes, it is time to make your very strong spirit drinkable. Mostly, this means around 80 proof. Don’t dilute the liquor in one day as this may spoil your final product. Add a little bit of condensed water each day to get the proof down around 5% ABV per day.
Now you’re ready to go. Cheers! We hope you’ve enjoyed our banana moonshine brandy recipe. Let us know in the comment section if you have any questions or suggestions.
